Creating an online course using the Feelbettr system
The Feelbettr event system is flexible enough to create both in person, online and self paced courses for your users.This page highlights how to create a self paced learning system that uses a combination of event management and locked pages.
Components of a self paced learning course
1. Event
An event to sell the event which acts as a hub for the course content. This event acts as a container that holds the information for the course and is used by the system to also hold the participants data.
2. Course Materials
A selection of materials for the course which can be:
- Downloadable documents (PDF)
- Locked pages
- Images
- External Links
Step 1. Create user groups, event categories you will need for the course.
You can skip these parts if you already have the user group, category and location set up.
User Groups - These are the groups that participants will be assigned to when they sign up for the class.

Please note that a user group needs to be "unfeatured" (not have a yellow star next to it) to be able to assign users to the event.
Event Categories - The category you will assign the course to.

Location - In some instances you may like to create a location called online to let users know that this is not an in person offering.

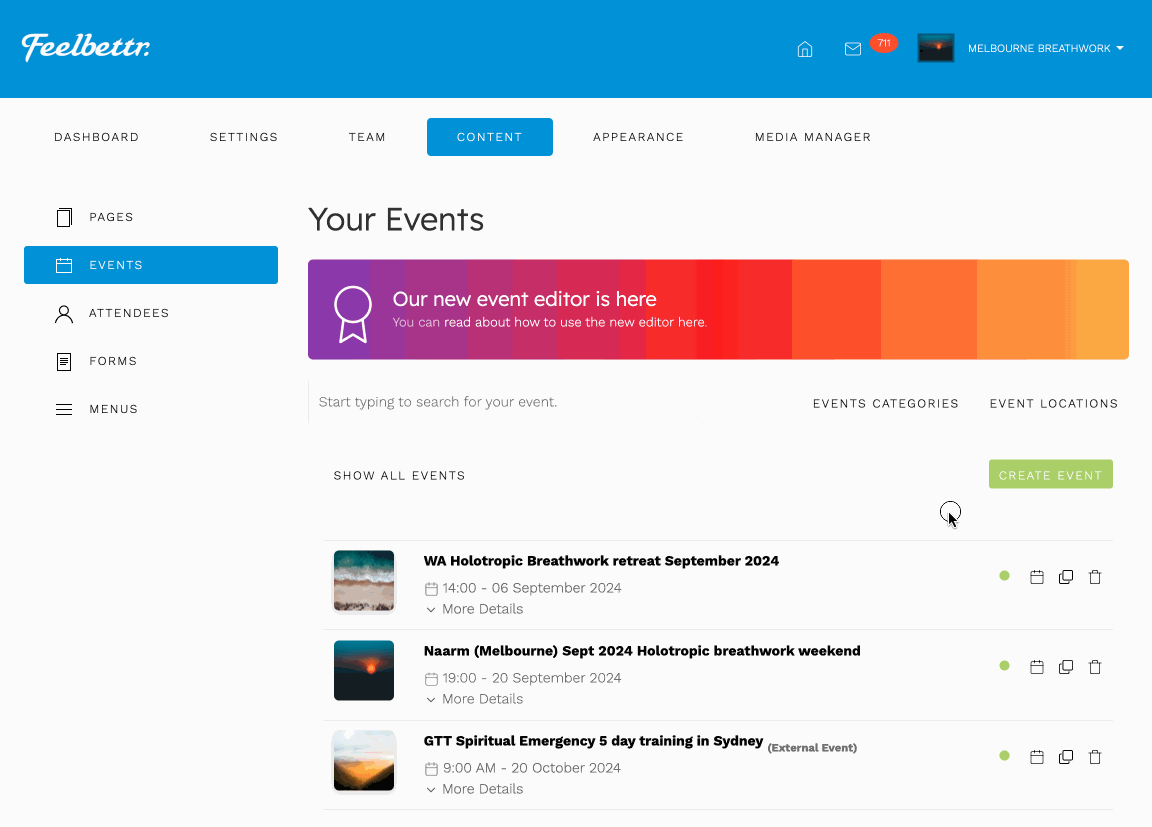
Step 2. Create the event
The event is used to "sell" the online course and holds all of the information for the course as well as the course materials. The event also serves as the entry point for the user accessing the course materials.
Follow the process outline here for creating the information for the event, or follow the screengrab below.
Setup the basic information for the course
Step 2. Manage attendees / participants
The next step is to determine how many people will be able to signup for the course. If this is an unlimited number simply add a very high number to allow for many people to sign up.
This document here outlines the process for:
- Determining how many people should be able to attend the course
- The link for payment for the course
- The forms you want participants to use when signing up for the course
- The various emails that get sent when someone signs up for the course
- The user group you want to assign users to when they sign up
At the very least you will need to do the following:

- Set the number of attendees
- Edit the text for the book now button - this is how the user signs up for the course
- Assign a registration form for the course. If you decide to use the default form leave this blank.
- Enable payment tracking - this will ensure that the resources will now be available to the user until they pay and have been marked as paid.
- Enter the link to where the participant can pay for the course. eg https://paypal.com/...
Step 3. Assigning course material
This document describes the process of attaching resources to the event. These resources become the material for the course.
- Select the pages, documents and external links you want to associate with the course. You will need to set up the pages separately to be locked. This document will help with this.

Step 4. Assigning user groups
User groups are a helpful way to determine who should have access to a "Locked page" within the system. Participants can automatically be assigned to a user group upon signing up for a course by adding a user to a group as per this document.

If you have payment tracking enabled the user will need to be marked as paid before they have access to the specified group/s otherwise if payment tracking is disabled the user will have access to the group and it's allocated content immediately.
Step 5. Ensure all other settings are set
- Ensure the event / course is published
- Create a menu item that directs the user to the course or ensure that the course is available on your website via widget embedded in your content ie a grid widget displaying events
Accessing course materials
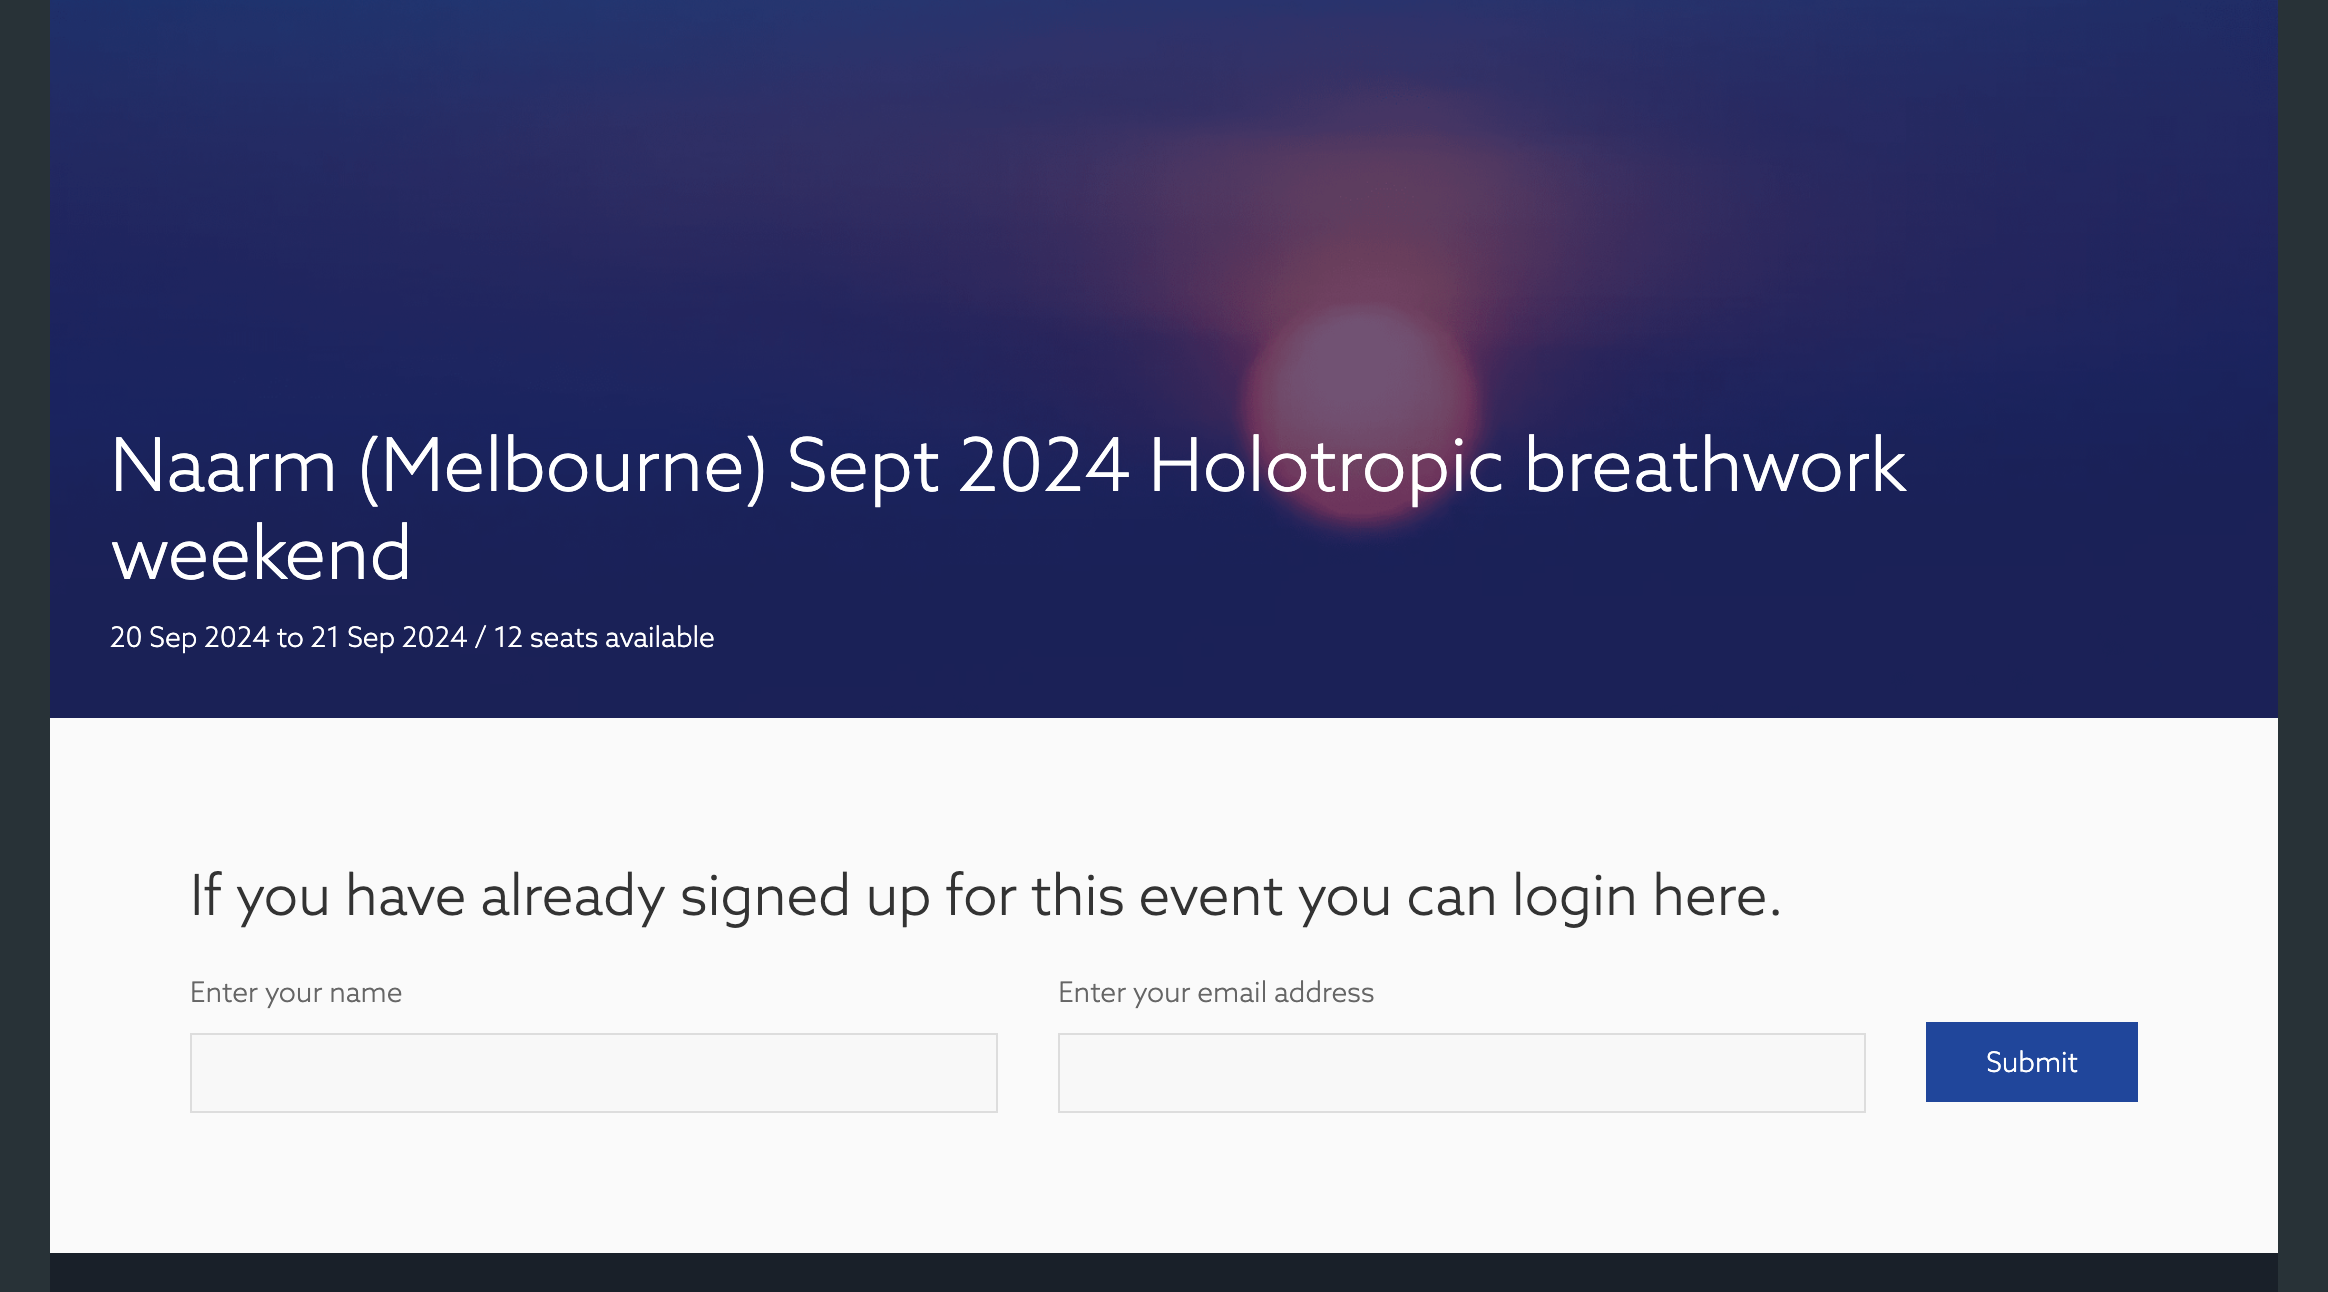
User Login
On the event page when the book now button is enabled there is a link with the text "Already signed up?".

When the user clicks this link they are directed to a login page which looks like the following screengrab.
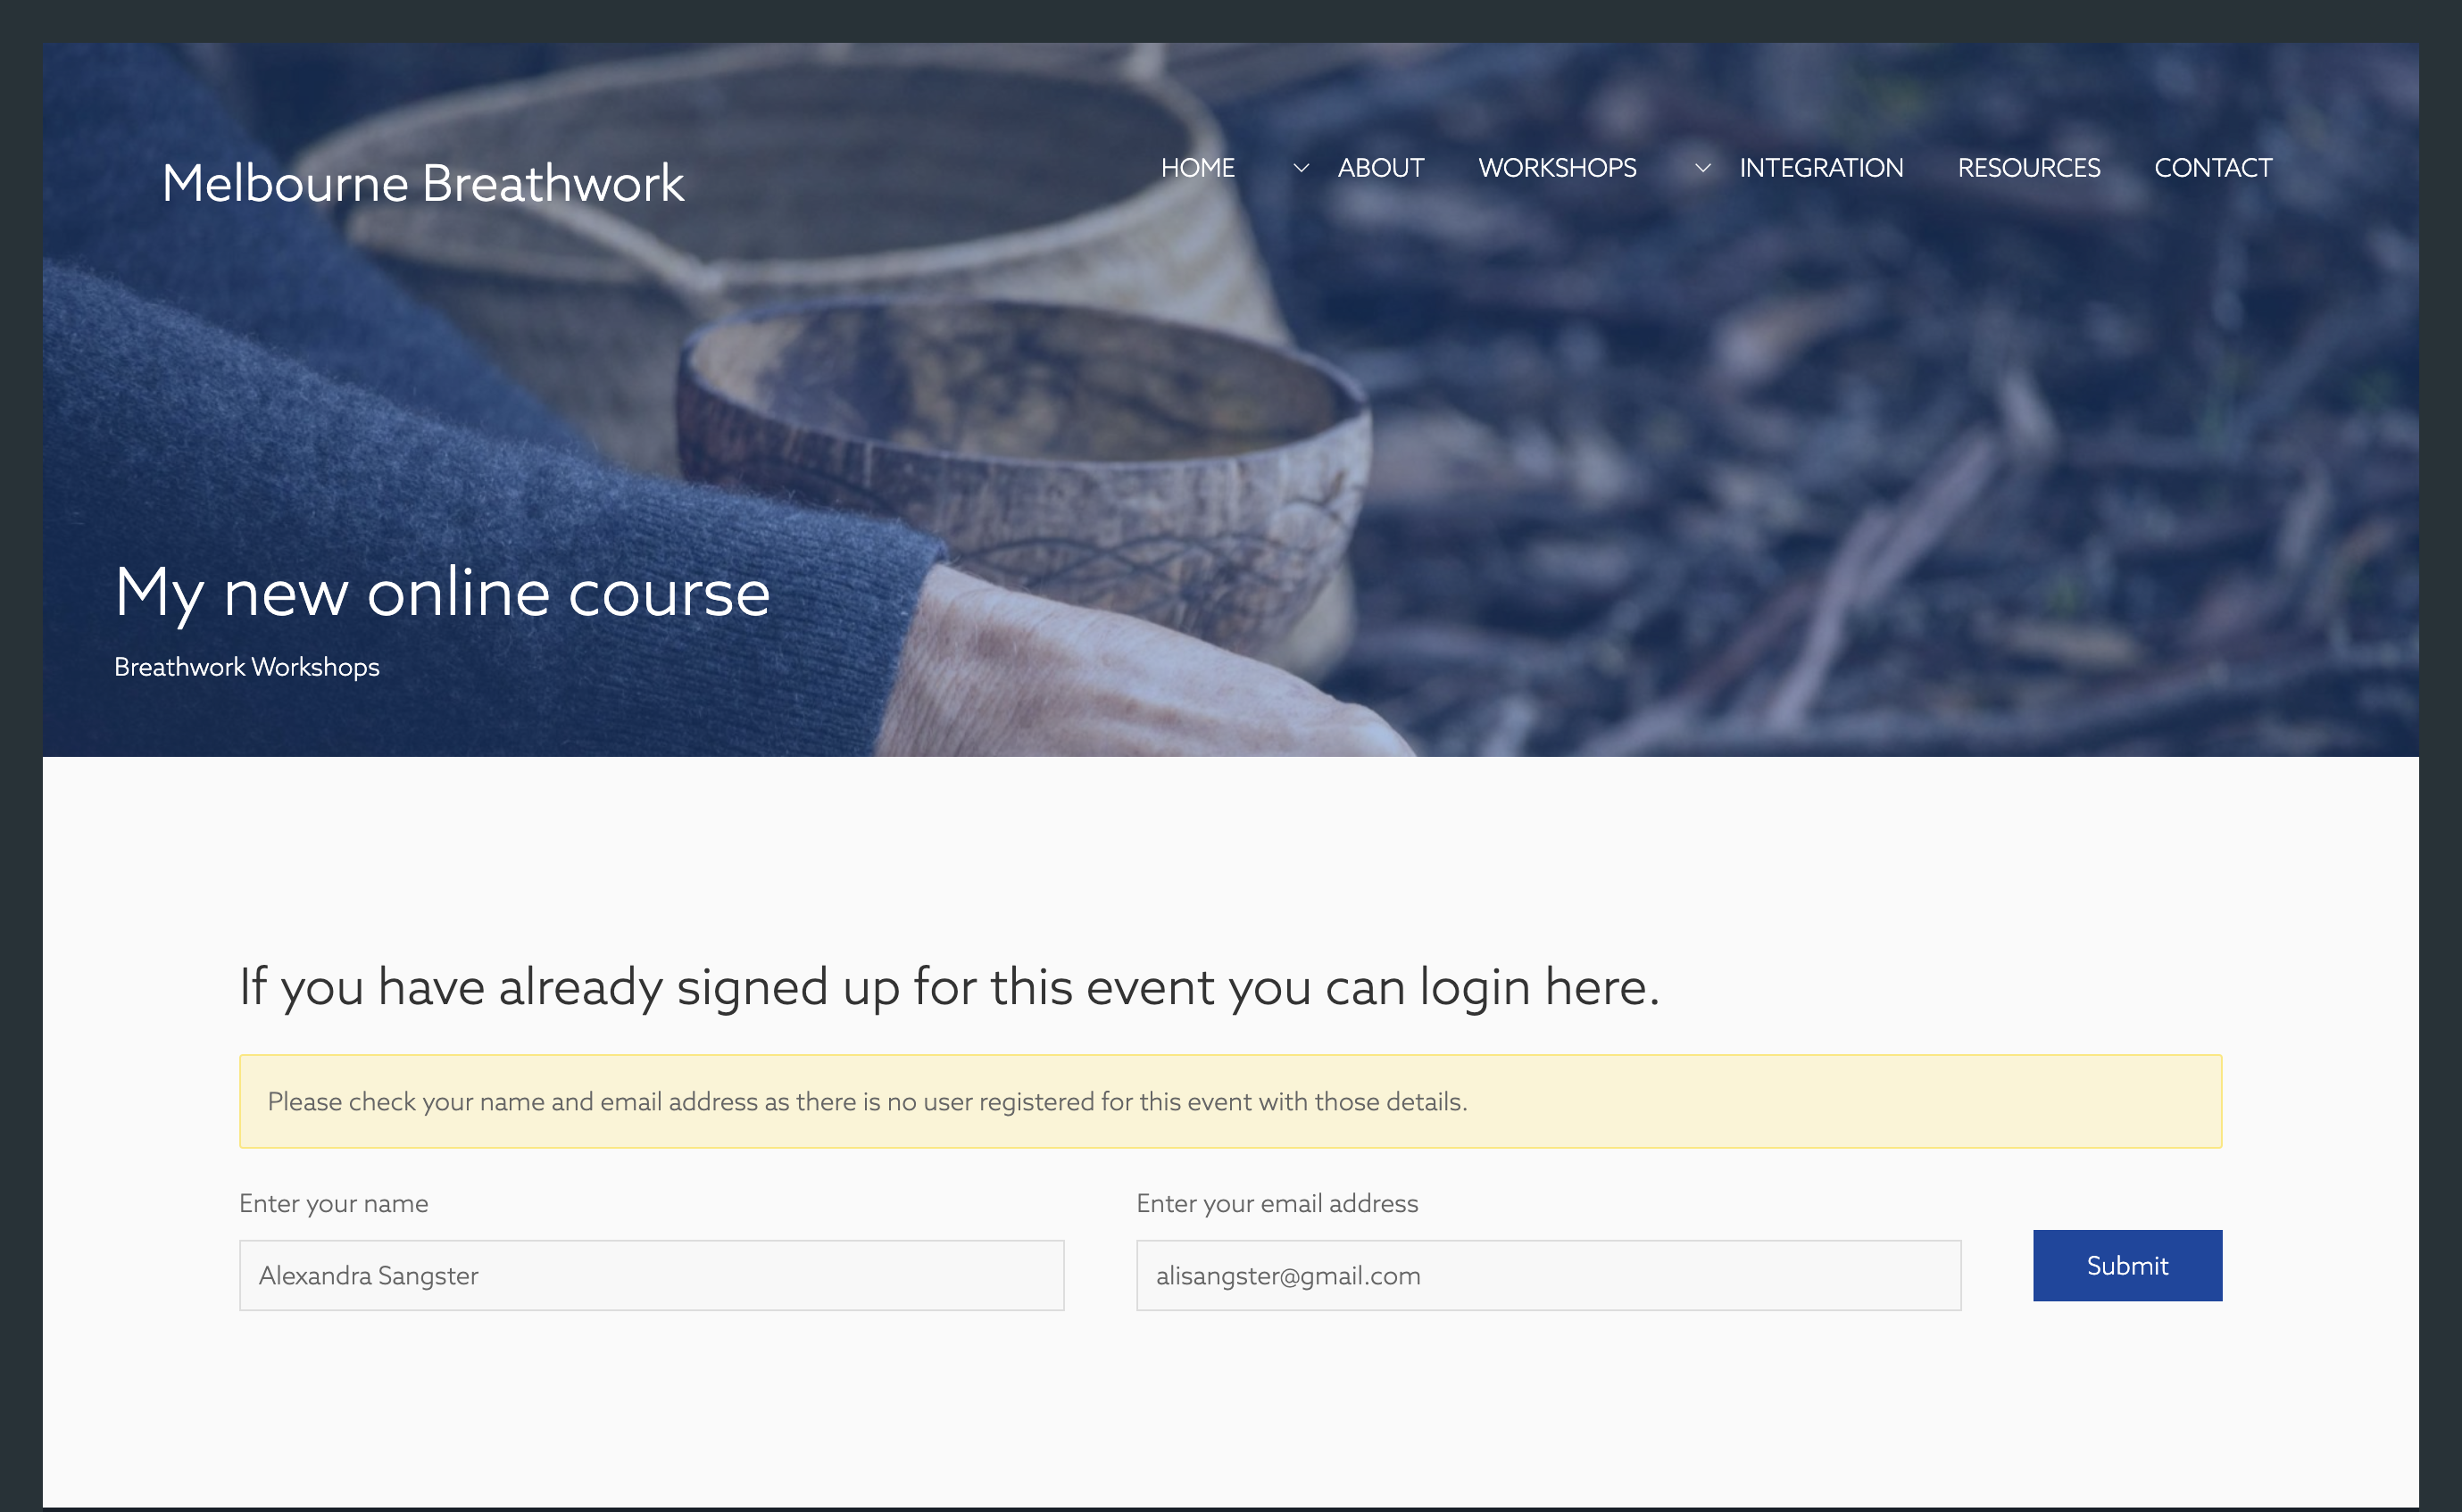
Unregistered user message
If the user has not yet registered for the event they will receive the following error message:
Email to registered users
After adding their details the user will be emailed a link to login to the event. The email is an added layer of security to prevent unauthorized access to the course.

User directed to the course materials
If the user has registered for the course they will receive the email above. When the user clicks on the link to the course in the email they are automatically directed to the course information and course materials.

Payment tracking
If you have enabled payment tracking for the course and the user has not paid there will be a pay for spot button on the registration success page. When the user clicks on this link they will be directed to the link specified in your event settings.
Please note that this is a manual process and for the time being there are no integrations with payment gateways to automate access to the course.
Until the payment has been processed the user will not be able to read the course materials and will see this message.

Allowing access to course materials
Once you have received payment for the course or you would like to give access to the course materials you will need to manually enable access to the course and mark the attendee as having paid.
To do this navigate to the https://www.naturalmedicinewebsites.com/dashboard/events/attendees page and find the name of the attendee who has paid.
Click on their name and click the shopping cart item in the slide out panel.

Once you have done this and the shopping cart icon is green, the user will have access to the relevanbt course materials.
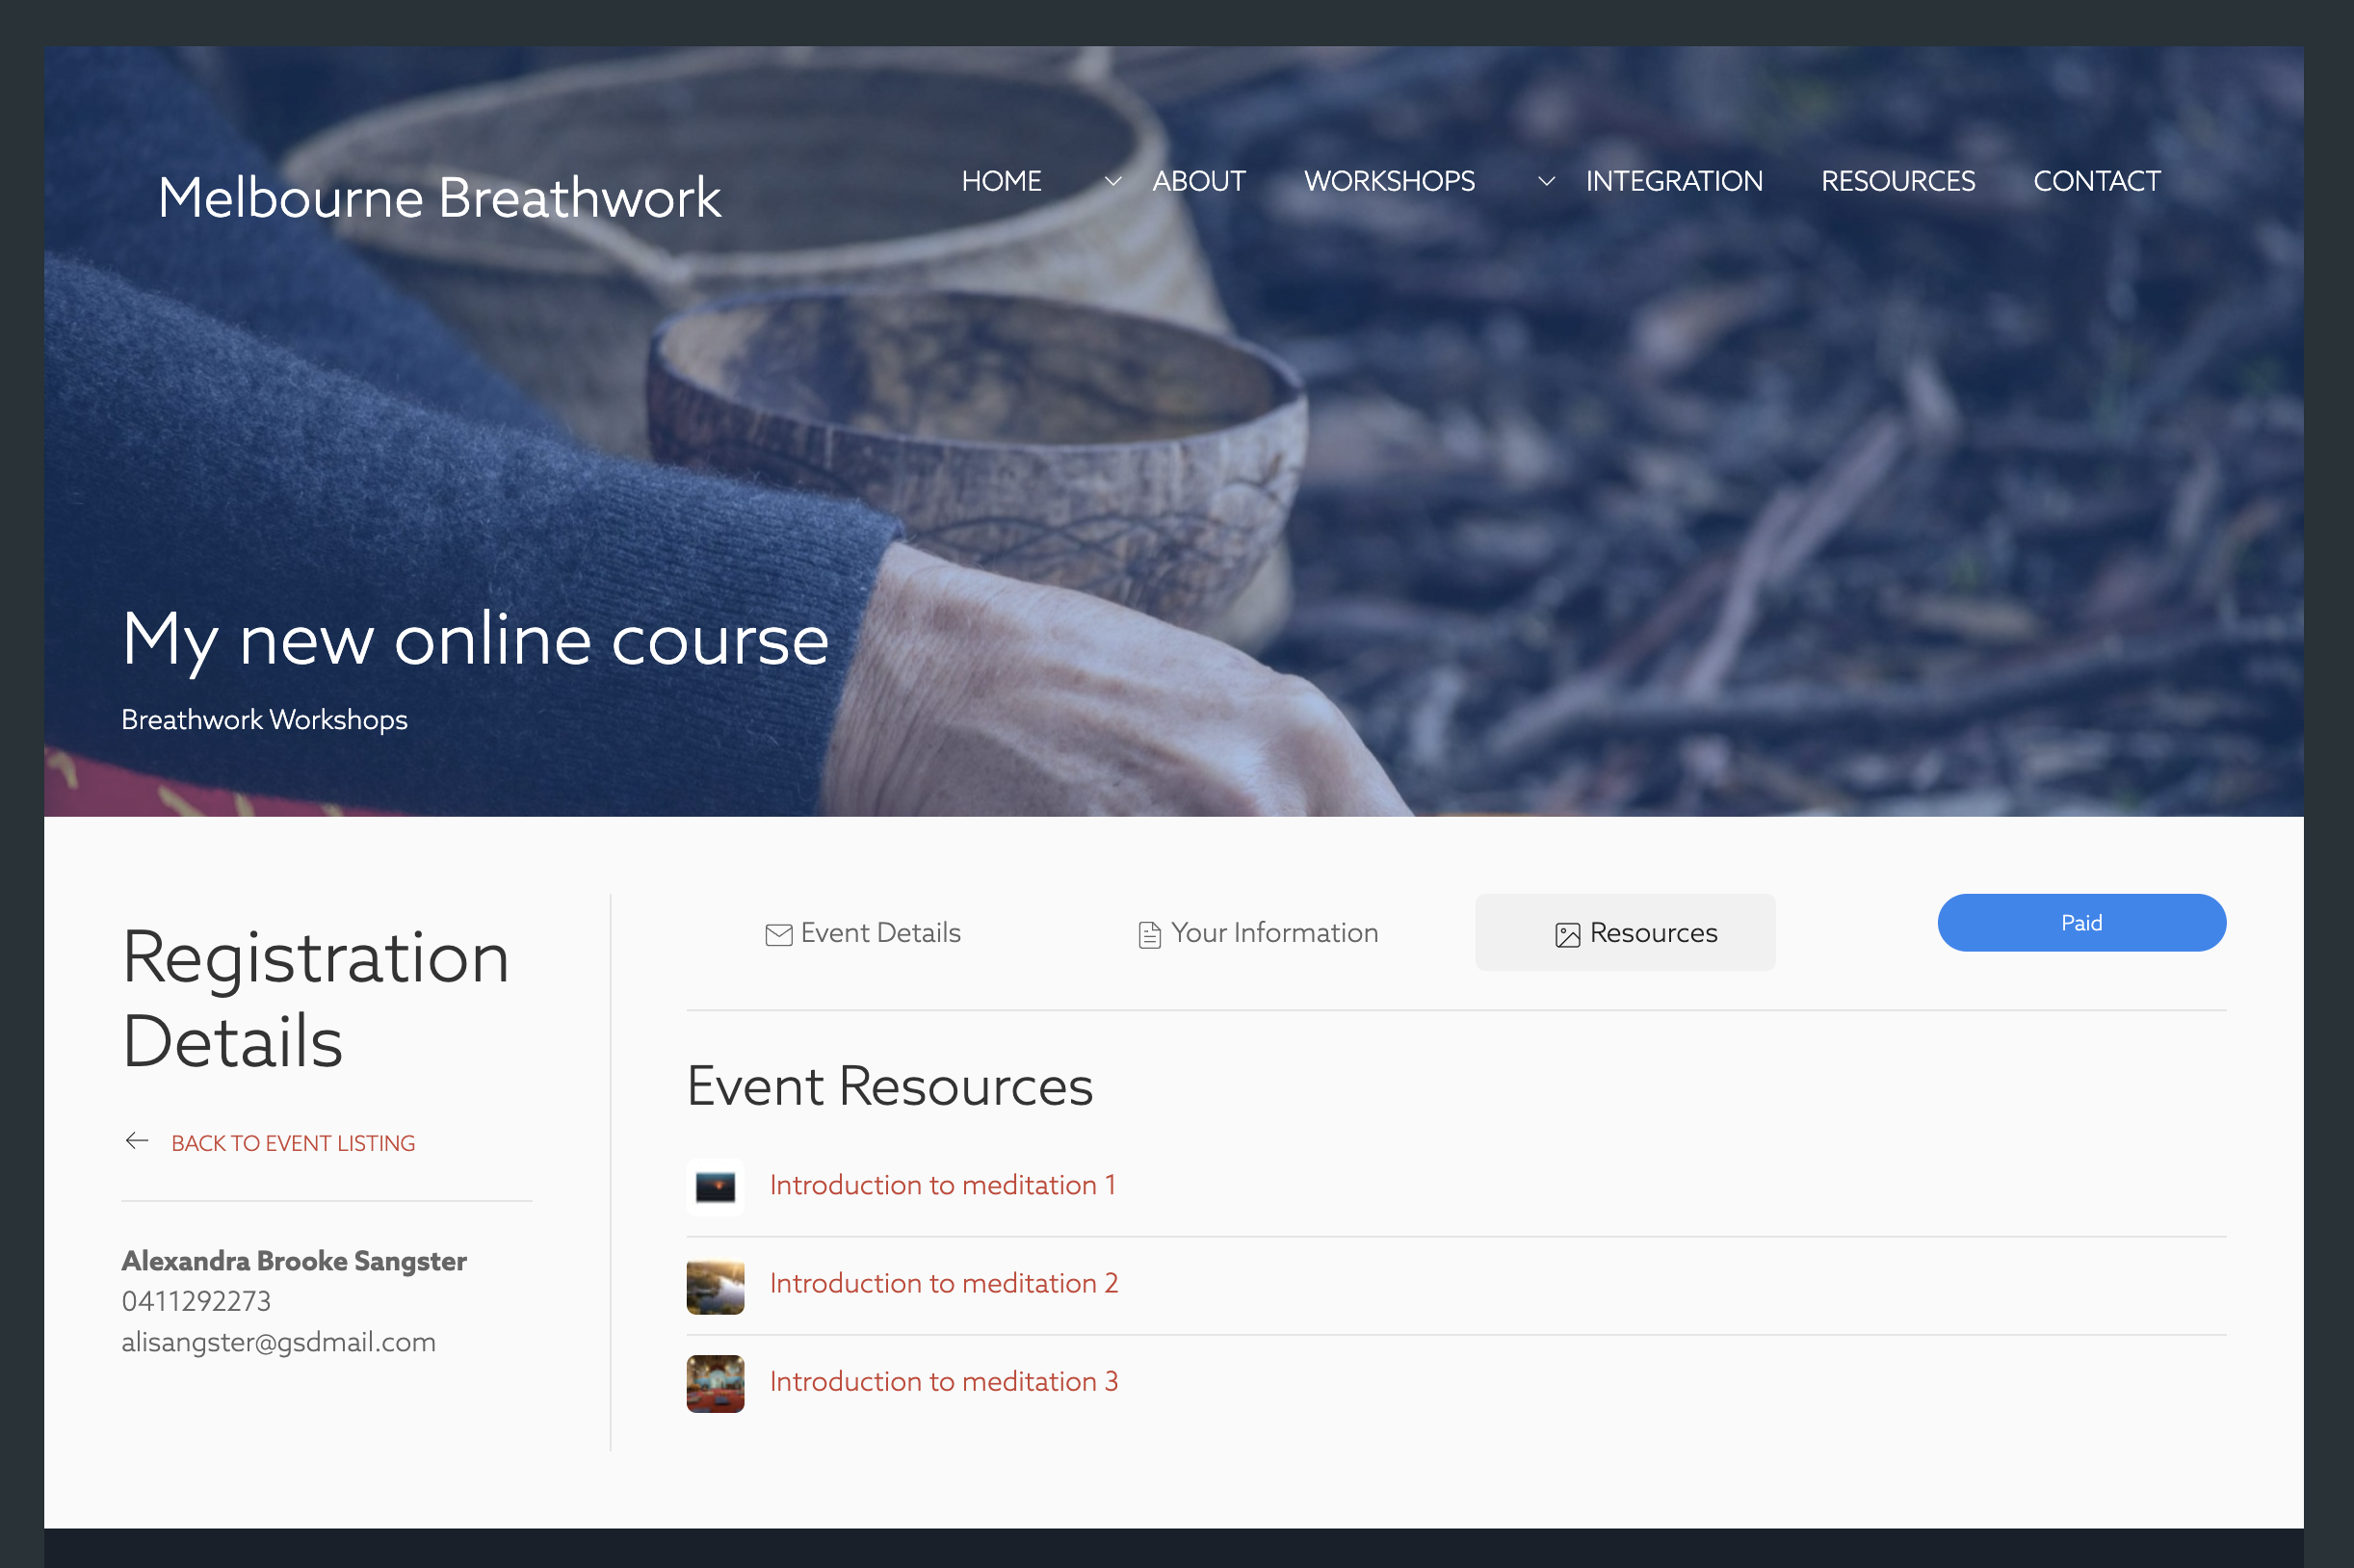
Now when the user clicks on the link in the resource section the resource will open for them and they will have access to your content.